Basic Country Sourdough Tartine Bread Recipe
Learn how to make a delicious same-day sourdough loaf with this easy Tartine Bread Recipe! Perfect for beginners, this recipe delivers a crusty, flavorful bread in just a few hours, without the wait.
Because of the shortened dough rise time, you can mix your dough early in the morning and bake fresh sourdough bread by evening. No long fermentation in the fridge overnight. Simply mix in the morning, and serve at dinner!

What is Sourdough?
Sourdough is a naturally leavened bread which just means there’s no commercial yeast added to make the bread rise. Instead, it’s fermented using a sourdough starter. It’s richer in nutrients and lower in gluten therefore making it easier to digest than breads made with traditional yeast.
If you’ve been around the sourdough block for any amount of time you’ve likely heard of Chad Robertson and his famous San Francisco Tartine Bakery. This is my go-to sourdough boule recipe. It turns out great every time without a long ferment time. I believe you’ll love this artisan sourdough bread and it will become a weekly routine in your home like it is in mine.
Sourdough Starter
Before you begin making bread, you’ll need what is called a starter. I’ve created a free download with easy-to-read, day-by-day steps to creating a homemade sourdough starter.
A sourdough starter is made by mixing just two ingredients…equal parts flour and water! Yes, it’s that simple. I have step-by-step instructions for making your sourdough starter here. Once you begin mixing flour and water in a jar, wild yeast and bacteria from the environment of your home will begin feeding off the flour causing it to multiply.
By feeding (sourdough jargon meaning adding flour and water to your starter) the starter regularly, it will gain strength and can eventually be used to make simple sourdough bread. This process of building your starter typically takes 1-2 weeks. It’s not a quick process but don’t worry, you’ll be a bread baker before you know it!

Feeding Your Starter for This Recipe
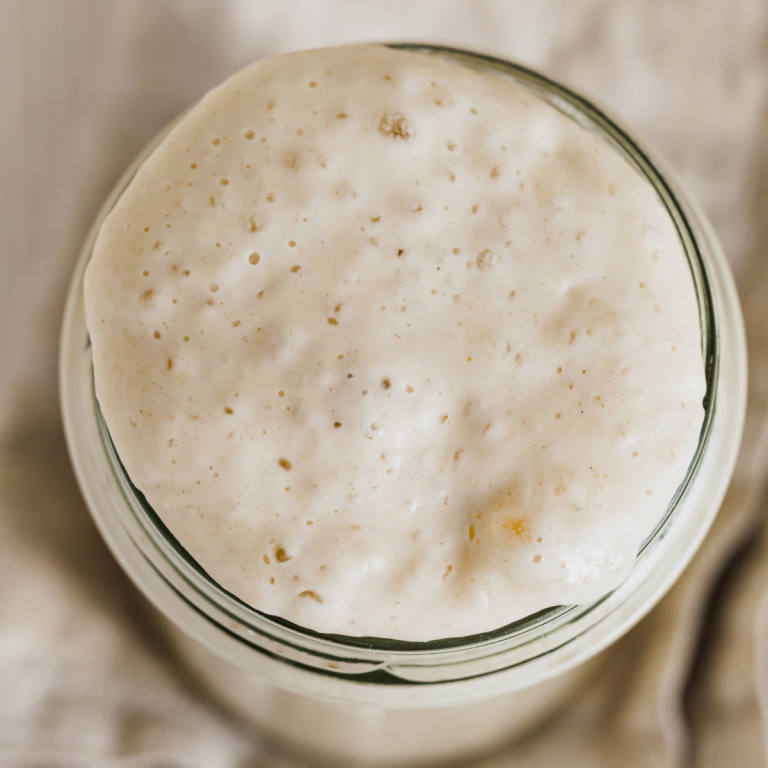
For this recipe, you’ll need an active fed starter. I recommend feeding it at night before bed so that it has enough time to rise overnight and can be used to mix your dough the next morning. Just make sure that 12 hours before mixing your bread, you feed your starter.
For this particular recipe, you’ll want to scoop 2 tablespoons of your starter into a clean jar and then add 200 grams of flour and 200 grams of water. Measuring in grams will ensure proper amounts. Grams and cups are not interchangeable units. I use this kitchen scale when baking and it ensures correct measurements. Don’t let the measuring intimidate you! Just get yourself an inexpensive scale and you’ll have no issues. While I prefer U.S Customary measurments for baking, the true Tartine loaf is measured in grams.
Ingredients for Country Sourdough Bread
One great thing about sourdough is that very few ingredients are needed to make a wonderful loaf of bread! For this bread recipe, you will need…
- Quality Unbleached All-Purpose Flour
- Quality Whole Wheat Flour
- Water
- Salt
You will need high-quality flour with a protein percentage of at least 11.5%. Most quality flours display protein content on the outside of the packaging. I prefer the Costco brand organic flour but if you don’t have a Costco close by, I would recommend King Arthur brand.

How to Make Tartine Bakery Sourdough
This recipe makes 2 loaves.
Step 1: The night before you plan to bake, feed your starter by adding 200 grams of lukewarm water and 200 grams of flour to 2 Tablespoons of starter. Stir vigorously, cover, and leave on your kitchen counter overnight. The temperature of your kitchen will affect the rise time, but by morning your starter should have doubled in size.
Step 2: Now that you have an active starter or leaven, you will use it to mix your dough. In a large bowl, combine 750 grams of water with 200 grams of leaven. Stir to disperse. Then add 900 grams of white flour and 100 grams of whole-wheat flour. Stir until there are no dry bits of flour. Cover and let rest for 30 minutes.
Step 3: Add 20 grams of salt (I prefer Redmond’s) and just a little bit of water and fold the dough into itself to incorporate. Cover and let rest for 30 minutes.
Step 4: For this step, you will perform a series of “stretch and folds” instead of kneading your dough. Take a look at the video below where I demonstrate this technique. Stretch and fold the dough every half hour for 2 1/2 hours. Be sure you have wet hands before folding to prevent sticking. After 2 1/2 hours, you should see about a 30% increase in volume. If not, give it another 30 minutes to an hour.
Step 5: Using your dough scraper, pull the dough from the bowl onto an un-floured surface and cut it into 2 pieces using your bench scraper. Gently shape it into two rounds by gently cupping the dough, pulling and twisting it towards you while building surface tension. Cover each round with a glass bowl and rest for 20-30 minutes. This will keep the surface of the dough from getting hard.
Step 6: Place each round into a fabric-lined banneton basket sprinkled with rice flour. Cover and let rest for 3-4 hours. This is called a bulk rise.
Step 7: About half an hour before baking, place your empty dutch oven inside the oven and preheat to 500 degrees. At the end of the resting time, turn your rounds out onto a piece of parchment paper. Using a bread lame, razor blade, or sharp knife, make 2 deep diagonal slashes into the rounds. Transfer dough by the corners of the parchment paper like a sling and very carefully place it into the preheated Dutch oven.
Bake with the lid on for 20 minutes. Remove the lid and bake for an additional 25-30 minutes until the outer surface is golden brown.
*Be sure to preheat again before baking your second loaf. If you prefer a dark brown crust, simply bake a little longer until you get the color you’re looking for.
Allow the bread time to cool on a wire rack for 1-2 hours before slicing. If you cut into your loaves too early the dough will be gummy.
Would you like to save this?
Sample Baking Schedule
8:00 pm: The night before you want to make and bake, you’ll need to feed your starter. Leave it on the counter to rise overnight so that it becomes bubbly and active.
8:00 am: The next morning check to see that your starter is active by using the float test. Simply make sure your starter floats when you put a small amount of it in water. Then proceed with mixing water, active starter, and flour. Cover and rest.
8:30 am: Add salt and incorporate. Cover and rest.
9:00 am: Perform your first series of stretch and folds. Cover and rest.
9:30 am: Another round of stretch and folds. Cover and rest.
10:00 am: Stretch and fold again. Cover and rest.
10:30 am: Stretch and fold. Cover and rest.
11:00 am: Stretch and fold. Cover and rest.
11:30 am: Perform your last set of stretch and folds on your dough. Cover and rest.
12:00 pm: Remove the dough from your bowl, divide, and shape loaves. Cover each loaf with an upside-down bowl for 20-30 minutes.
12:30 pm: Place each loaf in a rice-floured banneton basket. Cover each loaf and allow a rest time of 3-4 hours.
3:30 pm: Place the Dutch oven inside your oven and preheat to 500 degrees.
4:00 pm: Place your loaf on parchment and score. Carefully place it inside the preheated Dutch oven, cover it, and place it inside the oven. Drop the temperature down to 450 degrees and bake for 20 minutes.
4:20 pm: Carefully remove the lid of your ditch oven and continue baking for an additional 25 minutes.
4:45 pm: Remove the loaf from the oven and cool completely. Preheat oven and Dutch oven again for the next loaf and repeat.

FAQ’s
My dough doesn’t seem to be bulking up during my stretch and folds. What am I doing wrong? Nothing. It could be that the temperature is too cool in your home. You really need a warm environment for this method. Move your dough to a warm spot like near the oven and continue your stretch and folds for an additional hour.
How do I freeze my loaves once they’re baked? Once your loaf has cooled, wrap it tightly in plastic wrap and place it inside a freezer bag to freeze. When you’re ready to eat it, simply allow it to thaw at room temperature and reheat at 425 for 8-10 minutes.
What if I don’t have time to bake my bread on the same day? Just place your covered loaves in the fridge and bake from cold the next day. Just take them directly from the fridge, score, and bake.
Why do I need 2 different flours? The combo of white and whole wheat will shorten the fermentation time so that you can bake the same day as you mix.

Storage & Freezing Instructions
To store your sourdough boule, let it cool completely before slicing. Once it’s sliced, you can store it cut side down on a cutting board or place it inside a plastic bag. It will keep at room temperature for up to 3 days.
For longer storage, you can freeze the boule. Wrap it tightly in plastic wrap or aluminum foil, and then place it in a freezer-safe bag. When ready to eat, simply thaw it at room temperature, or for an extra-crisp crust, heat it in the oven at 350°F for 10-15 minutes. This helps preserve the texture and flavor of your freshly baked bread. You can read more about reheating sourdough here.
Helpful Links
Easy Sourdough Biscuits
Sourdough Bread Bowls
Establishing a Sourdough Starter


