Same Day Sourdough Sandwich Bread Recipe
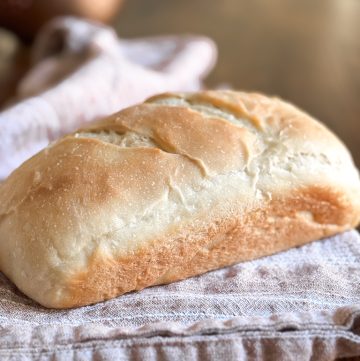
Mixed and baked on the same day, you’ll love this easy sourdough sandwich bread recipe. It’s quick, easy, and without all of the unnecessary ingredients of store-bought bread.

Sandwich bread is an item I no longer add to my shopping list. In almost no time I can have 3 fresh loaves of soft sourdough bread for sandwiches, garlic toast, and some of the best french toast you’ll ever have.
The best part is, there are no yucky chemicals or preservatives. I know exactly what goes into my bread and every ingredient is actual real food. Once you bake this recipe you will not go back to store-bought bread!

Simple Ingredients & Equipment for Sourdough Sandwich Bread
While the ingredients for this sourdough bread recipe are essential, most of the equipment is not. I recommend purchasing new tools and equipment as you go so that you can get started making bread without a lot of upfront expense.
- Active Sourdough Starter- If you haven’t jumped on the sourdough train just yet, be sure to grab my step-by-step infographic to establish your own sourdough starter. It’s free and it will walk you through the process with easy daily instructions. I also have a YouTube series if you are a visual learner.
- All-Purponse Flour- I’ve seen a lot of recipes that call for bread flour but I prefer all-purpose for this recipe.
- Water- I use warm water for mixing the dough.
- Milk- Warm milk works best because it helps with incorporating the honey.
- Honey- Get local honey if possible because of the health benefits but if not, Costco has a great price on organic honey.
- Salt- Good salt is worth the extra cost. Redmond is the only brand I use because it’s not heat-processed and stripped of its natural minerals.
- Butter- Again, get the good stuff. Quality ingredients do make a difference in not only taste but nutrition as well.
- Stand Mixer with Dough Hook Attachment- Having a stand mixer isn’t required but it makes kneading the dough much faster. 4-5 minutes in the mixer versus 10-12 minutes by hand.
- Danish Dough Whisk– Handy for stirring and combining because it’s designed to keep the dough from sticking.
- Bench Scraper- Such a handy tool for scraping, cutting, lifting, etc.
- Loaf pans- I use 9×5 inch and these are on my wish list!
- Bread Lame- This tool just makes scoring easier.
- Bread Knife- A good serrated knife will make cutting into your loaves so much easier and can help with getting thin slices for sandwiches.
Bakers Timeline
8:00 pm-Feed your starter
8:00 am-Mix Dough/Rest
3:00 pm-Shape loaves/Rest
5:00 pm-Bake

How to Make Sourdough Sandwich Loaf
Begin with A Sourdough Starter
First things first, you’ll need a sourdough starter in order to make this recipe. Establishing your own starter is much easier than you think. You’ll only need 2 ingredients; flour and water. I’ve created a simple infographic guide to establishing a sourdough starter.
My guide walks you through the daily process step-by-step. Once you have an established starter that’s active and bubbly, you can use it to make more recipes than you can imagine starting with this soft sourdough sandwich bread.
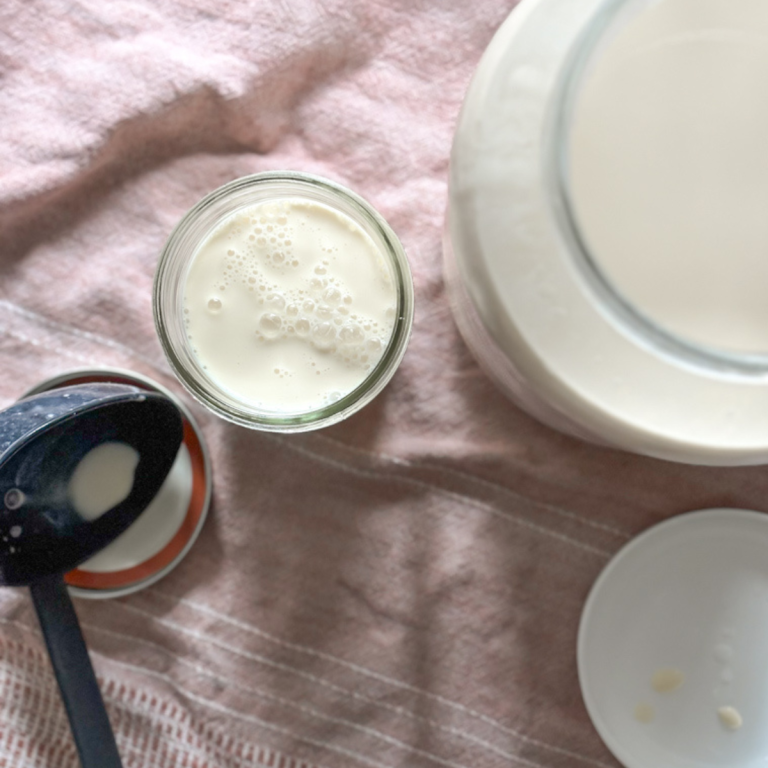
The night before you bake, simply add 2 Tablespoons of starter into a clean jar (I prefer these Weck brand jars) and add 1 cup of flour and 1 cup of water. Stir and leave out on your counter overnight to rise.
Mix The Dough
The next morning, to the bowl of a stand mixer, add 2 1/4 cups of warm water and the active leaven from the night before. (This should be about 2 cups.) Stir to disperse.
Then you’ll add 3/4 cup of warm milk, 1/4 cup of honey, and 4 cups of all-purpose flour. Stir using your Swedish dough hook until combined.
Allow your dough to sit for 20 minutes covered and then add an additional 1/4 cup of honey, 3 Tablespoons of melted butter, 1 Tablespoon of salt (I prefer Redmond), and 3 cups of flour.
Using your dough hook attachment, knead the bread in your stand mixer on low speed for 4-5 minutes or until the dough is soft and elastic and pulls away from the sides of the bowl.
Bulk Rise
Place your dough into a large mixing bowl and cover. I often times use a plate to cover my bowl but plastic wrap will work as well. Allow your dough to sit on the counter for the first rise also known as bulk fermentation for 4-8 hours.
Rise time is forgiving. I typically lean closer to 5-6 hours because I prefer to bake my bread the same day. However, you can bulk ferment overnight on the counter as well.
Shape Loaves
You’ll notice your dough looks soft and has increased in size. Now it’s time to shape your loaves. Using your bowl scraper, pull your dough from the bowl onto a lightly floured surface.
Divide the dough into 3 sections using your bench scraper. Working each section, spread the dough out on the counter, fold one side into the middle and then the other side over the top of it to form sort of a rectangle shape.
Would you like to save this?
Starting at the top, roll the dough towards you and tuck it under to form an oval shape. Cup your hands and pull the dough towards you to build some surface tension.
Place the loaves into greased or buttered loaf pans.
Second Rise
Cover the bread pans and let your dough rise a second time for up to 2 hours.
Score and Bake
Preheat your oven to 400°F and score the tops of the loaves with a few simple cuts.
Place your loaves in the preheated oven and drop the temperature to 350. Bake for 40-50 minutes or until the internal temperature of the loaf reaches 200.
Butter the top of the loaf and cool on a cooling rack.

BONUS: How To Make Sourdough Rolls
If you’d like, you can use this recipe to make deliciously soft sourdough rolls. I like to bake 2 loaves of bread and one pan of rolls with this recipe. To make the rolls simply divide one of your dough sections into 12 small pieces.
Roll each section into tight balls and place them in an 8×8 baking dish. Be sure to butter or spray your dish. Cover and allow them to rise just the same as the loaves and bake at 375 for 25-30 minutes. Brush with butter while they are fresh from the oven.
If you notice the tops beginning to get too brown, just cover your pan with foil as they continue to bake.

How to Store and Freeze Sourdough Sandwich Bread
Store fresh bread at room temperature in a plastic bag. I’m not a huge advocate of plastic but it works well for keeping your bread fresh.
Another option is to keep your loaf under a glass cake plate dome. This is also a beautiful way to display your sandwich bread.
You can also freeze your sourdough sandwich bread one of two ways…
Whole loaf: Wrap your completely cooled loaf of bread in plastic wrap and place it inside of a freezer bag. When you’re ready to use it, just take it out of the freezer and thaw at room temperature.
Sliced: This is our favorite way to store fresh bread. Simply slice and flash freeze it for 1-2 hours. Once the slices are frozen, add them to a freezer bag. This is a great option for when you just need a slice or two at a time! Just pop a frozen slice into the toaster or thaw at room temperature.
Once you’ve made homemade bread it will be hard to enjoy store-bought. Not only do I enjoy the process of bread making, but I feel great knowing that what I serve my family is much more nutritious than white sandwich bread from the grocery store.
If you’re just getting started with bread making, I would encourage you to start with this recipe for the best sourdough sandwich bread and then dive into learning other recipes and skills of bread making.
More Sourdough Recipes To Try
Basic Country Loaf
Sourdough Cinnamon Rolls
Easy Sourdough Biscuits
